Thursday, August 13, 2009

The Man Pit

Though we've lived in this house for over 4 years, there are only 2 rooms I consider done. The kids rooms. Everything else remains a work in progress. But another room that is more on the finished side, and I hope to be completely finished in the next couple of months is "The Man Pit". My husband's rec room.

To say my husband is a sports fan, doesn't cover it. The man is a sports freak. He loves sports. Specifically any team that has any ties to Syracuse University. He's an Eagles fan because of Donovan McNabb (lets not talk about Micheal Vick right now, we're in morning over here.)

Here are a few pictures of his rec room in progress.


The sofa and love seat are a little beyond tired, they are about 12 years old but they have to last a few more years.

On of my favorite parts of this room, is the shelf that we ran down the long wall. I was warned not to do this - it would my the long room look longer. And it does... but I think it works. In some odd way, I think enforcing a "negative" feature, can make it a good one. A double negative makes a positive in my world I guess.

The shelf came from Ikea, their Lack collection I believe. We bought 5 of these and put them end to end to end to end to end... where the pieces came together, sometimes it work, others it didn't. Where it didn't - we hung a pom-pom. Thus, making it work.

The wall opposite the long shelf features the Lack entertainment center and the 30 feet of shelving are perfectly balanced opposite the heavy entertainment center.

Wednesday, August 12, 2009

Day Dreaming: What I'd like to Make - 081209

If there is one thing I've learned, I dream of a lot more projects than I get to make. I actually shop for a lot more projects than I get to make, that is a bit embarrassing to admit. I've got supplies, or partial supplies for a lot of projects, but it seems to be that whatever project I'm prepared for, is the last one I want to make.

Here are a few of things that if I was stocked to make, I'm sure I'd hop right on them. (Sure I would...)

Weekender Tote:
How can you not want to make this adorable bag... I'd actually like to make 2 or 3 of them. I think it would make the perfect bag to carry all the things that keep the kids occupied while we try to have dinner out. It would also make the perfect bag for my mom... I can see her using it for her projects or even a weekend visit here...

And then there is the Reversible Patchwork Bucket Hat - I've planned on making this all summer.
But I'm not sure it is worth the trouble, the little monster man won't wear hats - except of course from any old Easter Bonnet that Bug has laying around, he'll wear those. Just not anything that my husband would want to let him out in public in.

And have I mentioned that Bug loves to cook - how cute would it be to make matching aprons for us???

I especially like what they've done with that black and white fabric... oh, how I love it. I think this pattern would also make a good gift for my Sister-in-Law. Then again, she can sew better than I can - it might be embarrassing to give her something I made.

Sadly, too many ideas... not enough time, energy or money...

Wow, this has turned rather depressing for me hasn't it?

Pity.

Monday, August 10, 2009

Halloween in August

I came home tonight to our first Halloween Catalog. I know other families who've had them for weeks, others still who've had it planned for months. And you can now add us to the list of Halloween planners.

Bug has decided that she wants to be a yellow and blue bird. Something similar to this:

I see a lot of feathers in my future...

In the past Bug has had a mix of handmade, pulled together and store bought costumes but I think I'm in the mood to tackle this one. I think it just might end up being my favorite, here are a couple of our past favorites, back before princesses and fairies took over our world:

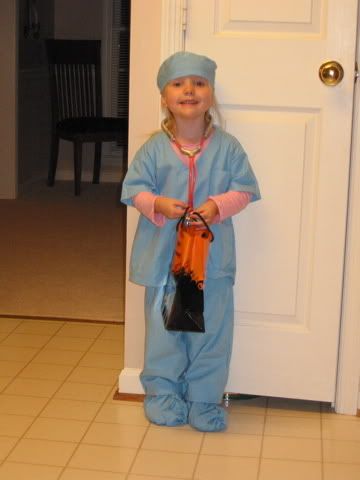
When she was 3 and a half, she had wanted to be a doctor, so we got her her own scrubs, pulled out the medical play kit and created "Dr. Bug."


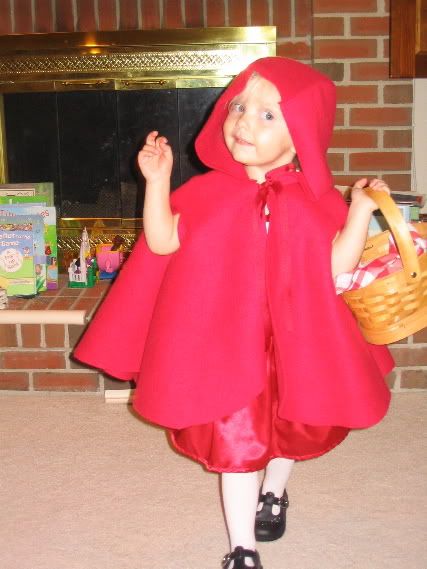
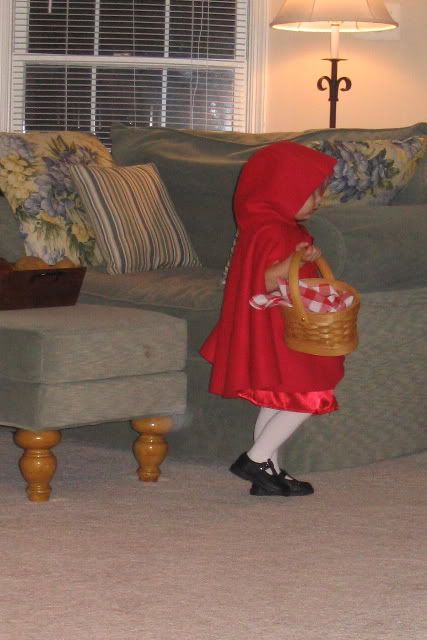
Hands down, my favorite, was when she was 2 and a half and went trick or treating as "Little Red Riding Hood." I made the cape out of fleece so that no matter the weather, and here in Virginia it can easily be 45 as it can be 85 for Halloween - she could wear it, either with a t-shirt (as she did) or a turtleneck. Then a cute satin skirt, white tights and black shoes. We even took it so far as to have her basket of "goodies" be what she collected her treats in.

Tell me this isn't the cutest costume ever?

Thankfully, I've got 2 months to figure this bird thing out -oh and plan something for her brother... poor little guy, with the exception of Peter Pan last year, his Halloween costumes have not gone well.

Monday, August 3, 2009

Crayon Crazy

A little over a week ago, I went to Eastern Market in DC and fell in love with... well, I fell in love with everything. I'm lucky Eastern Market is about an hour away and not very easy to park around otherwise I could get into trouble.

But one thing in particular that I fell in love with what a photo that I thought would have been perfect for the kids play room. It was of a fresh pack of crayons, spiraled out in a circle with all the tips pointed to the center. The problem, it was $250 - that was the "sale" price. What was particularly annoying is that the expensive part was the frame, which I couldn't have cared less about, but the vendor wouldn't separate them.

So, I decided to create it myself.

And now - a disclaimer. I suck at photography. I know it, I accept it, I live with it. We don't have the best camera, I don't even know what to buy that would be an upgrade. I just don't have the energy.

I decided to give it a go anyway, and I'm really pleased with what I came up with. Since my camera isn't a super duper 27 mega-pixel thing, or whatever the latest technology is, I knew I wouldn't be able to take a very large single picture that would have enough presence. So I opted for 3 different photos.

Here is the before:

And here is the after:

And here they are one by one:


My favorite view:

So I ended up with 3 photos, instead of 1, for a lot less money.

Crayons - Free, thank you Birthday Party goody bag
3 - 11x14 photo prints (that I cropped to 11x11 each) $36
3 Frames - $36 thanks to 40% off frames
Craft paper for faux mattes - free, already had it.
Total: $72 plus 2-3 hours to take, pick up, crop and hang the photos.

Edited to add: If anyone is interested in recreating this on their own, I have the original photographs that I'd be happy to send to you for you to print and do with whatever you want.

Sunday, August 2, 2009

Decoupage Switch Plate Cover

I'm becoming a decoupaging monster. Muahahaha

So as I when I finished taking pictures of Bug's Finally Finished Jewelry box, I was on my way out of her room when I spied her pathetic switch plate cover.

Our house came with the WORST switch plate covers in the history of interior design. They had all be painted over by previous owners and looked awful. Our only choice when painting the rooms was to leave them awful, or paint them with our colors and only have them be half awful. (I hate painted switch plate covers.)
(I didn't even have time for a proper before picture before I started taking the thing off the wall, the screws were there, though with layers of paint holding it in place, they weren't needed. Yes, I'm rolling my eyes.)

And here is her switch plate cover now less than 24 hours later:

I'd really like to replace all the switches in the house to a fresh white, but I'm afraid of electrical and my husband doesn't see the point if changing them. Maybe I can see if my father-in-law wants to make that a project next summer...

Saturday, August 1, 2009

The Year Long Jewelery Box Project

This is embarrassing. I'm not joking when I say this project has taken over a year.

I bought this little unfinished jewelery box for Bug to decorate and give to her for her 5th birthday. She just turned 6, and I just finished it.

I'm pretty sure it has been painted no less than 6 times, each time I hated it. I'd put it away for weeks, months... and still hate it. Sand it down, try again. Hate it again. I was halfway through my 7th attempt at it when I found the blog Mod Podge Rocks.

So here is where it started a couple of days ago:


And here it is, finally finished:


Bug insisted I show you the inside too:


The varnish was hardly dry when she snatched it from my craft area to bring it to her room and start filling it. It isn't perfect, but as the Nester says, "it doesn't have to be perfect to be beautiful." And I'm trying to embrace that or I'll never finish anything.

I definitely learned a lot and learned I love decoupage in the process. I don't like working too much with thicker papers, they didn't want to stay "stuck" and curled up a bit. I also liked that for me, decoupage seems to be very forgiving... and of course, my favorite part of being creative is that no one sees what was in my mind as I was creating it. They only see the result. So if the "vision" and the "result" are different, embrace the result and forget the vision.

Monday, July 13, 2009

The Bug's Room AKA, the Decorating Cents Room

My daughter has one of my favorite rooms in our house, not that she sleeps in it - she's bunking with her brother for a while but I digress.

We completed this room for under $500, hence "The Decorating Cents Room."

Here is the "before" as in before we moved in... How the old owners had it.


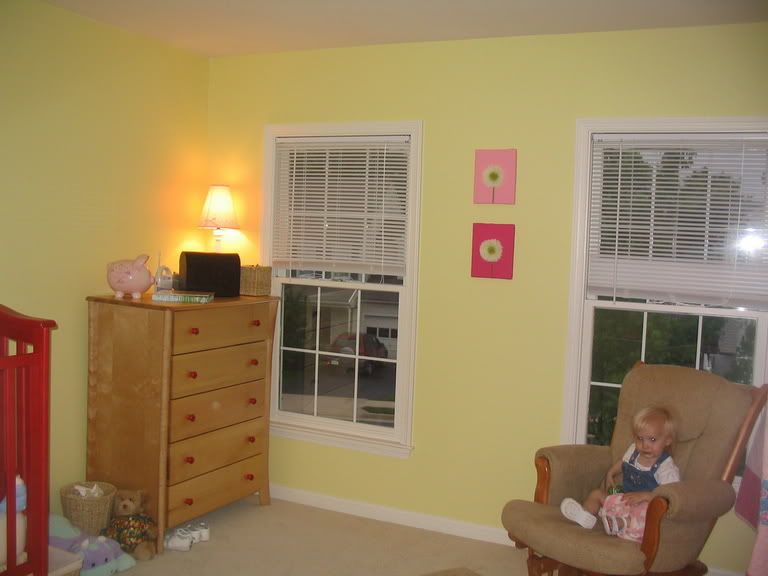
And here is what we did for the first few months we lived here, just to warm it up with what she had from our town house we transitioned her to the big girl room she has now.


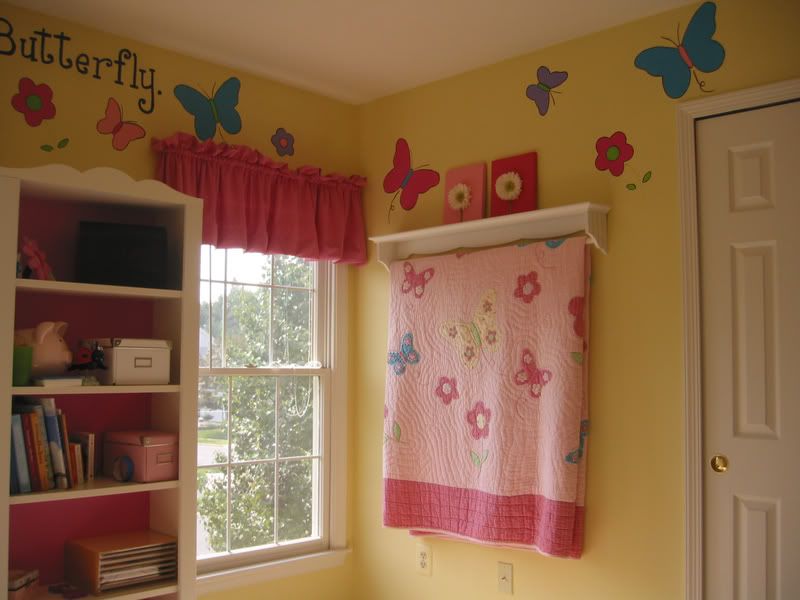
So here is the after:

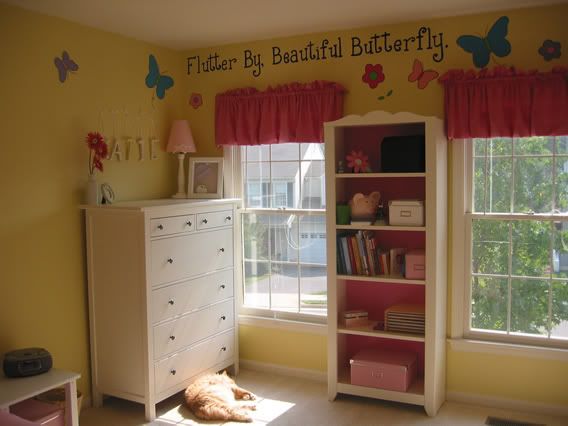
Seen above:
Dresser from Ikea, originally a honey pine piece that was slightly damaged, got it for $199. We sanded, primed and painted it white. (it came in white, but in a laquer finish that I HATED)

Valances $8 - made myself from some Rasberry Chambray fabric I got at JoAnn's.

Bookcase - $70 from Ikea, we covered the back panel with pink wrapping paper to give it more pop. (The unit came in white.)


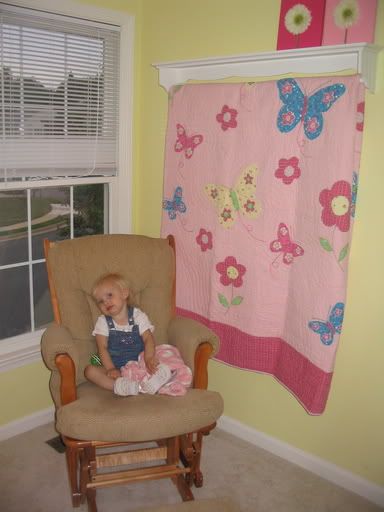
Seen above, nothing new. The quilt rack was from our living room and the quilt we had from the town house... cost - $0


Seen above:
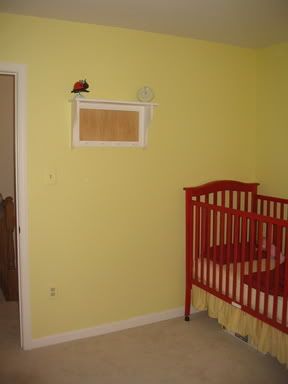
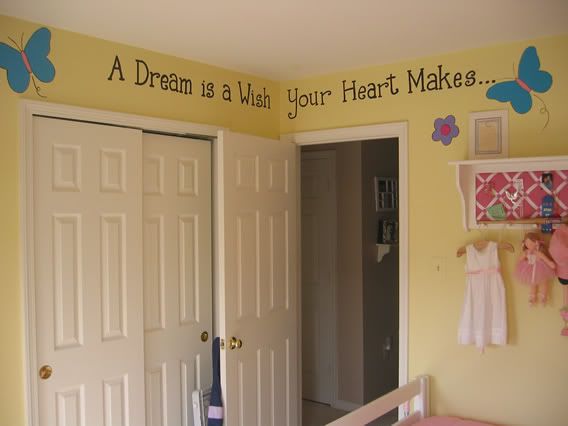
I covered the memory board from her shelf that we'd had from the townhouse with the same window treatment fabric and some scrap ribbon - cost : $2 or less.

The items on the memory board... we'll they are memories, including her baptism dress. I love that dress...


Seen above:
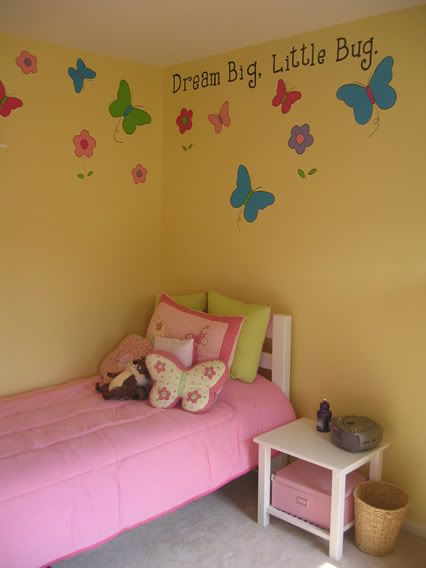
Bed: Frame from Craigs list, $50. Originally it was a rough pine like the stuff you see from "this end up" we sanded, primed and painted it white. Mattress was bought new for $75 on clearance.

Side table: Ikea, unfinished table $19... sanded, primed and you guessed it... painted white.

Bedding: Sheets and comforter set bought at homegoods for $40 total, on clearance. Pillows made from pillow forms and scrap fabric. Cost $0.

Also seen throughout the room, the quotes, lady bugs and flowers. I painted those by hand. I pulled the colors and shapes from her quilt.

Plus other random accessories including storage boxes that were under $50.

Total cost: $438, many weekends planning, painting and assembling... and a whole lot of love. Priceless.

Thanks for stopping by!!!

Monday, July 6, 2009

Our (creative) way to handle duplicate gifts.

My 2 kids have 3 sets of grandparents, 2 uncles (both named Mark as luck would have it), 2 cousins, a variety of adopted aunts and uncles, many friends and 2 adoring parents...

This adds up to a lot of gifts come birthdays and holidays. Inevitably we end up with duplicates or things that come very close. Rather than taking them back to the store we've started what has come to be one of my favorite traditions.

Whenever the kids get a gift that is a duplicate, close to something they have, or not up their ally at all. We set it aside. In December my office holds their annual Toys for Tots collection and all the duplicate toys are donated from the kids. We've been doing this so long, my kids don't even realize that gifts can be returned to the store.

Sunday, July 5, 2009

4th of July Jammies!

Each year we celebrate the 4th by heading down to a little festival in the next town over, we have a wonderful dinner at a city tavern, followed by lots of out door fun while we wait for the fireworks. My favorite part of the tradition starts when we change the kids into their 4th of July jammies that we buy each year at Old Navy.

Only this year, I forgot to buy the jammies. No big deal, they could wear regular jammies right? Wrong, my daughter bawled on the 2nd when I told her I'd forgotten. Looks like it isn't just my favorite part of the tradition. I found 2 pairs of Navy blue shorts, and 2 white tops at Target and JoAnn's was having a sale on fat quarters so I picked up red, white and blue fabric for $3.

Here is what I started with:

I applied some heat bond to the back of the fat quarters and then cut out a bazzilon stars.

Next I removed the backing on the heat bond, applied them to the shirts and shorts using an iron.

With everything bonded to the jammies I toyed with idea of calling them done...

But some of the stars didn't seem like they were going to hold all that well... so I spent about 2-3 hours stitching around the bazzilon stars.

And it was totally worth it!


And here is the best part of 4th of July Jammies, when the fireworks are over, and the kids look like this:

All we have to do is get them home and roll them into bed!

Friday, June 5, 2009

Janie's Painting

A couple of months ago, Bug's good friend welcome a new baby sister, Janie. Being the third child in the family we knew there wasn't much they truly "needed" for the new baby so we decided to welcome her with a painting of her name.

A while back we found this wonderful scrapbook paper that we just knew would inspire something down the road.

So I painted a simple 8x10 canvas pink:

And then sketched out some of the flowers and her name in pencil:

And here is the finished piece (I can't find my "good" picture of this, and it has long since been given to sweet baby Janie.) For some reason the pink doesn't look as bright as it did in real life and every other color in the picture looks twice as bright...
Related Posts with Thumbnails