Sunday, January 31, 2010

1 Frame, 3 ways.

I found these adorable frames at JoAnns yesterday on clearance for $2.50 each.


At that price, I picked up 3 and right away knew I was going to do a Valentine's series in them. Here is what I decided to do with the first.


Materials:
  • 5"x5" Frame
  • Hearts cut to a variety of sizes
  • Square of burlap (left over from the place mat project) 
  • Black paper
  • Foam Mounting Squares
Mount the burlap to the black square, and then begin layering the hearts with the mounting foam squares to give some dimension to the piece.

Side view to see how the layers are working.

Keep going 'till you're out of hearts and then put the piece in the frame.

Ta-daaaaa


They aren't photographing as cute as they look in person... bummer.
Look for the other 2 frames later in the week and then I've got to find a way to display them together.

Saturday, January 30, 2010

Hopping on the Burlap Bandwagon

So everyone seems to be using burlap lately. I feel like I can't open a blog without seeing something burlap.

I've had an aversion to burlap that I couldn't put my finger on, but I decided to go for it today and went out and picked up a yard of the stuff to make some place mats with.

Here we go!!!
 

Materials used (and picured)
  • 1 yard of burlap, bought at JoAnns for $2.50
  • Red yarn, inherited from mom who knows when
  • Scissors
  • Tape measure
  • Tapestry needles.
Step 1 - cut the burlap to your desired size, making sure to first cut off the selvage so you've got no threads bound at any edge. After seeing some awesome square pace mats while out to lunch in Vegas the other day, I decided to go for 15.5"x15.5" squares. (I'd love to show you a picture of the ones I saw, but it was a business lunch with my boss sitting next to me and I didn't think it was really a good idea to whip out my iPhone and take a picture of them right then.)

Step 2 - allow the edges of the burlap to fray a bit, but NOT to the finished point you are hoping for, throughout the rest of the process here, it will fray more... so if you want a half inch fray, and you get a half inch fray off the bat, you'll end up with an inch fray. Be forewarned. Oh, and be prepared for lots of fuzzies.

Next up - and I'm sorry for the super blurry picture, I didn't realize 'till downloading that they looked like this... Anyway, Next up, measure in about an inch, and pull on one of the strands of burlap. Then pull the whole sucker out. It might break, that's ok, just fish out the rest with a needle and keep pulling.


Then pull out 2 more...

Step 5 - Thread your tapestry needle with your desired color of yarn and begin weaving the needle through the space you opened up being sure to go opposite of the threads to the right and left of where you are weaving.
 

Step 6 - Keep on weaving all the way to the end. 
 
Step 7 - Count over a bit, I counted over 7 strands, and then pull out 3 more strands from the burlap and weave another length of yarn through. (You can see here what I mean about additional strands fraying on the edges while you're working.)


Step 8 - From here... do whatever you want... you might want to keep right on going all the way to the other side of the place mat with the stripes. You could turn the mat and go perpendicular to the first 2 strands you've woven in (which is what I did.) It's up to you.


I decided I only want to frame the top and side of the mat, it seemed how ours were meant to look. After I'd gotten everything the way I wanted, I clipped the ends of the red yarn, and cleaned up the fray.

Here are our finished place mats:


I'm pretty happy with how they turned out, we don't usually do place mats on this table,  still want to see every inch of it after all the hard work that went into it. But I did want a little color and texture on it right now. I imagine after Valentine's day is over I will store this away and perhaps do a runner down the middle.

Linking this up to Saturday Night Special at Funky Junk Interiors and Make Your Monday.

So flattered...

I was in Las Vegas for 3 days this week for a business trip. After a really long long day, I was just about to go to sleep when I decided to quickly check my personal email.

My eyes lit up as a flurry of comments had come through, including one from Michelle at Someday Crafts letting me know that she had featured one of my projects on her blog!

This is my first feature in the blog world!!! It probably took me an hour to fall asleep after that.

So I've added a new little widget to my blog, "Flattered to Be Featured By:" over there on the right.

: )

Now, back to work... I've got some things to finish up before I dive head first into buttons and burlap, though not on the same project.

Thursday, January 28, 2010

Failed Candle Holders

So not all projects go as planned, we all know that... figured I'd share one of my failures...

I had high hopes to make these little "love" votive holders. I assembled my materials.
  • 4 Glass Votive Holders
  • Glass Etching Cream
  • Contact paper to use as a stencil
  • My cricut to cut the contact paper
  • Some red vinyl that I was going to try a little something different with.
So I cut the contact paper and applied it to the votive.

I even burnished down the edges
(Photo by my son, had to use it...)


I then applied the etching cream according to instructions. Which I didn't want to photograph for fear of touching the camera and the etching cream at the same time.

Batch one didn't work out... at all really. I left the cream on the full 5 minutes, thought I had applied it liberally enough, but ended up with spotty results.


Yeah... that is not the look I was going for.

So I reviewed the instructions, and decided that it could have been because they weren't quite clean enough and maybe I didn't apply the etching cream liberally enough or leave it on long enough...

I tried again.

I failed again.

Parts turned out better:

But no single votive was even close to being what I wanted.
I might try again... I might not. 

Wednesday, January 27, 2010

Stamp Art

So when most people hear "Stamp Art" probably think of something made from a rubber stamp...

Well, that isn't always the case.

I have a bit of a facination with Jim Henson, it is a long story that I won't bore you with but when the stamps celebrating him came out a few years ago I bought a bunch. Not to be used, no... too special for that. I put 2 sheets together and framed them.


I've got this hanging in my office, it is home with me for a few days, something about it has given me an idea for a new project.

We'll see if it turns out...

Tuesday, January 26, 2010

Valentine Gift Bags

So I posted about the little sweet treat boxes the other day.

But those are pretty small... so I've got these bags that I've been decorating that I thought I'd share.

They start as simple brown paper gift bags, I picked up a package of 12 for less than $5 at Micheals. 


Had some shapes left over from a few other projects and I simply glued them onto the bag... couldn't be easier.
 

Monday, January 25, 2010

Sweat Treat Box

Around the holiday's I found this pattern for an adorable little box, I used them for little treats for Bug's teachers but never got a chance to post about them.

I was able to cut this out on my Cricut using Sure Cuts A Lot but I realize if you wanted to, you could print the template out and cut it yourself - it isn't really terribly intricate.

With Valentine's Day coming, I figured it would be fun to make these again.

Here is what I did... First, cut out the box on red card stock.

Then I scored it at the folds and selected some shapes in white to glue onto the box.

Glued the shapes on and assembled the box.

Tucked a few treats inside:

 
And here is our Sweat Little Treat Box...


Sunday, January 24, 2010

Love Love Love...

I really don't do too much seasonal decorating aside from a WHOLE lot at Christmas, a little for the Fall and maybe a touch of something for Spring.

But there is something about having kids that has made me want to celebrate a little more, give more attention to the other holiday's and changes of the seasons.

I found these great vases as AC Moore a couple of weeks ago, they were just $2 each. And of course I forgot to take a before picture... but I've got 5 of them and this is just one project so hopefully I'll get a before at some point.

So, a little red vinyl...

Cut on the Cricut...


Turns into this:
 

And if I want, at the end of Valentine's I can just peal the Vinyl back off and do whatever else I want with it, or tuck it away to celebrate with next year.


Wednesday, January 20, 2010

Starry Starry Bedroom

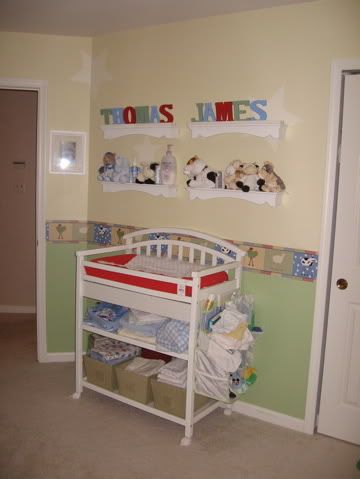
The stars in my son's nursery are by far one of the favorite design details I've ever done.

They were inspired by the stars found in the prints by Kimbery Grant.


Here is how we did it...

First we just started with the simple painted room, beige on top, green on the bottom and a traditional wall paper boarder.


Then I created a star on my computer and printed it out. I could only print 8.5"x11" so I enlarged it on a copier up to 11x17 so I could have 2 sizes of stars, one small, one large. I cut them out and used them to create an outline with painters tape on the wall.


Then I mixed a bit of the beige from the walls with white paint that we just had laying around from who knows what other project. About 1 part of each.

I simply painted the stars with the lightened paint and removed the painters tape.


One of the details that I think really helps this work was allowing the stars to but up into the windows and up onto the ceiling.

A few more finished pictures... Because I can't resist.


Tuesday, January 19, 2010

SMILE!

So we've made Ana's clip art rails and my plan for them was to feature the kids artwork on them for the bottom clips.

For the top, my daughter and I worked on a little project. I asked her for a list of words that she thought of when she thought of the play room here is what we came up with:


We then agreed our favorite word from the list was "SMILE." So we turned to the cricut and cut the letters out along with a bunch of what we agreed looked like "bubbles." We had so much fun making the bubbles that we couldn't stop and ended up with extra's which now are on the bottom of the rail... for now. We'll likely swap these out as we feel like it.

For now, it certainly makes me Smile.


A couple of close ups: