Showing posts with label Saved Big. Show all posts

Tuesday, September 7, 2010

$2 Etched Beer Mugs

Not sure if there are going to birthday gifts for my mom and stepdad or Christmas gifts, either way, they are done and I'm happy with the way they turned out.


Materials:


  • Beer Mugs - found at Dollar Tree, so each of them were only a $1. 
  • Etching Cream
  • Paint brush
  • Vinyl or contact paper
Step 1 - Cut the vinyl however you like, either by hand or with something like a cricut and apply the vinyl to the glass.


Step 2 - Liberally brush on the etching cream & let set well past what they tell you to. 


Step 3 - Rinse off the cream and remove the vinyl.


Step 4 - Clean off any adhesive or other residue and you're good to go.


Tuesday, August 10, 2010

Butterfly Project

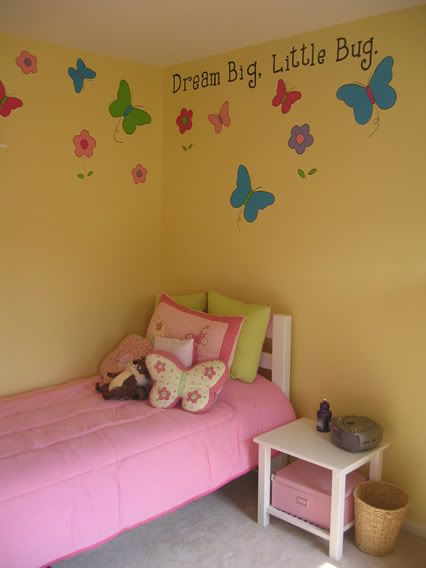
The mini-renovation of Bug's room continues. About a month ago, she decided her bedroom was too baby for a 7 year old. I didn't want to completely redo her room, just punch up the colors and create some more mature accessories.

We pulled the color from her wall mural down onto the newly modified daybed:


With this next project I decided to run with the colors a bit more as well as the butterflies. I'd seen something I liked over at Restorative Living that I used as my inspiration. We went about it slightly differently, be sure to check out her tutorial as well.

Here is what I started with:

  •  2 Scrapbook frames. I love square frames and scrapbook frames are a great way to get a square frame without having to spend a fortune.
  • Scrapbook paper & Circut to cut the butterflies. You could also purchase precut butterfly die cuts or cut them yourself.
  • Foam mounting tape
  • Paint (for the frames)
  • Foam board or other rigid material to mount the scrap book paper to.
  • Spray adhesive
I was thrilled to be able to round up all the materials except the foam tape at home, so the total out of pocket cost for this project was less than $4.

Step 1: Paint the frames the color of your choice, I wanted white.

Step 2: Cut the butterflies to the size of your choice, I went with 1".

Step 3: Mount the background paper to the foam board and trim to the size of your frame.


Step 4: Take the butterflies and begin playing with arrangements that you think work best. It took me a bunch of playing to get the right layout, but once I had it, I loved it!!!

And finally - my finished layout.


Which I then had to replicate on the 2nd piece of paper mixing up the order of the colors.


Step 5: Scoring and folding the butterflies. One by one, remove the butterflies from your paper, score them so that their wings fold up, and then return it to its place. Repeat over and over and over 'till all the butterflies are folded as you see below.


Step 6: Cut a very thin strip of the foam adhesive and apply it to the back of your first butterfly along the body.


Step 7: Press the butterfly firmly into the spot you picked out just for him. Or her. And repeat over and over and over again. (Note: when I took this picture I hadn't folded all the other butterflies, a step which I realized was good to get out of the way all at once just about a row of butterflies later.)


Step 8: When you've got all the butterflies attached, slip the piece into your frame.

Step 9: (And you thought you were done.) Take a couple of the remaining butterflies and add them to the frame for an extra touch of whimsy.


That is it. This project was really easy, time consuming, but easy.

Here is the before and after, please excuse the mess around them, we're working on the other accessories and all...


A few closeups:


Thursday, August 5, 2010

Pinching Pennies?

Wanted to give a quick shout out to Megan over at Polish the Stars, she's hosting her first link party, Pinching Pennies that you should check out and link up to.

While you're over there, be sure to check out her Nightmare Before Christmas Birthday Party - I'm going to borrow some of those ideas for our Halloween Party this year and check out her Kitchen Renovation too - you'll see Megan and I are on the same wave length with our white cabinets, blue walls.

Tuesday, August 3, 2010

Thirft Store Find: Old or New? Trash or Treasure?

I had an amazingly productive morning at work. Almost too productive, to the point where by lunch I felt like I couldn't do another thing - to help clear my head I decided to take a walk.

I ended up at this very hit or miss thrift store across this street. Turns out, it was a good day. I've never been one of those people to really have an amazing score at a thrift or antique store. Well, today - I found this:


I've gone so long with such bad luck at thrift stores I'm questioning my own judgement a bit. I had a coworker look at it and she agreed, total treasure.

But, I'm insecure and I'd really love your opinion. On 2 things actually - did I find something good here? And is it really old or did someone recently make this. The hinges seem new-ish, but everything else seems old. There are NO markings on it anywhere, well except where someone has drawn in pencil in a few locations.


What do you think? Old or New? Trash or Treasure???


What do do with it now, when I first spotted it I thought I was going to paint it, but if it is really something old, it seems somehow "wrong" to paint it. Plus I love the metal pins on the door, I don't want to mess with those and they would be hell to cover and paint.


I really appreciate ANY and all comments on this one!!!


(Oh, and by the way - this piece, cost $40, did I pay too much?)

Polka Dot Toss Pillows

I'm pretty sure these are the easiest toss pillows I've ever made.

They started as a pillow case for a body pillow:

When I decided wanted the back bolsters to be the same fabric as the side bolsters that left me with a body pillowcase to figure out what to do with:

(Wojo was confused too)

Then I realized I had 3 pillows, 2 from Bug's little girl room, and one from our room that were not being used.

 (Wojo agreed, "cut the suckers up" he said.)

And so out came my seam ripper... 
And out popped the pillow forms:


So I cut up the pillow case into 2 squares and 1 rectangle. (One of my pillow forms was in rough shape, more on that in a minute.)


All I had to do was sew the open edges, pop in the pillow forms and I had 2 new pillows.

Now, as for the ugly pillow form, it has been around a while and covered at least 3 times. So I decided to liberate the filling inside, it was much more useful to me that way:


Part of the filling went into the smaller of the pillows, the rest I'll show you tomorrow.


And here are the finished pillows on the daybed:


One more set of pillows tomorrow... stay tuned.

Sunday, August 1, 2010

From Bed to Daybed

Things are going really well in my daughter's room makeover.

One of the first things we have tackled has been her bed. Keeping in mind that she doesn't actually sleep in it. For the past year and half she's been sleeping in her brother's room - they've got bunk beds in there and it just works for them.

The purpose of Bug's room is really for her to have a place to play, hang out with her friends and keep her stuff/clothes. So we decided convert her bed into a daybed. Here is her bed before:


Nothing too fancy, a simple white pine bed that we painted white and used regular bedding for.

And here is her new daybed:


And here is her and her best friend already enjoying the new space. I could barely pry them off the daybed this afternoon to add new pillows and take pictures. They used it to play their DS's on, listen to music on Bug's iPod and we actually found them both passed out there after their visit to the pool.


Over the coming week, I'll share how I made each of the pillows on the daybed and how we went from this:


To this:

Linking up to the CSI Challenge @ CSI Project - see the full list of fabulous link parties that I participate in by scanning the column on the right.
Related Posts with Thumbnails