In honor of Breast Cancer Awareness Month, I made this set to give to my mom - she's a 15 year survivor.
This set was created using the same method I posted last month. If you're interested you can check out the earrings here and the bracelet here.
Saturday, October 9, 2010
Friday, October 8, 2010
Made 2 Match: Fail
Well as proof that no project is perfect, I learned my lesson about making sure you're gentle when working with these napkins as I applied the mod podge a bit to carelessly to my vase and ended up with this on the back.
Grrrrr.
In theory - I could have found a matching piece of the pattern and filled it in. But the back of the vase faces the wall so I left it as a little reminder of the need to be gentle.
Grrrrr.
In theory - I could have found a matching piece of the pattern and filled it in. But the back of the vase faces the wall so I left it as a little reminder of the need to be gentle.
Labels:
FAIL,
Friday,
Made 2 Match
Thursday, October 7, 2010
Made 2 Match: Coasters
What would a napkin series be without a coaster feature. They are a go to project for repurposing napkins. So much so that I wasn't sure about including them here, but I really loved the way this collection turned out.
Materials:
Step 1 - Have your helper coat the tiles with mod podge.
Step 2 - Apply the napkin to the tile and then coat with at least 2 coats of Mod podge. And of course varnish if you like.
Step 3 - Put the cork on the bottom of the coaster so that you're not saving your surface from water, but ruining it with the tile.
And there you go - coasters. Here are just a few of the ones that I've created from the Vera napkins.
Materials:
- Tiles
- Mod Podge
- Lovely Napkin, that yes, you've separated down to only the printed layer...
- Foam Brush
- Cork or felt
Step 1 - Have your helper coat the tiles with mod podge.
Step 2 - Apply the napkin to the tile and then coat with at least 2 coats of Mod podge. And of course varnish if you like.
Step 3 - Put the cork on the bottom of the coaster so that you're not saving your surface from water, but ruining it with the tile.
And there you go - coasters. Here are just a few of the ones that I've created from the Vera napkins.
Labels:
crafts,
Decopage,
Gifts,
Made 2 Match
Wednesday, October 6, 2010
Yarn Balls
I'd be lying if I said I had anything to do with this fall collection - I started this project headed in a completely different direction.
Completely. Different.
That idea failed miserably.
But while cleaning up the mess from the failed project I started winding the yarn I was working with into balls.
Then I realized I loved the texture. So I kept winding.
And winding...
Until I had a bowl full of these fabulous fall colors in delightful textures.
The yarn is 100% wool, so I felted a few of the balls. I thought I was going to felt all of them... but my goodness it took FOREVER. So I decided to keep some of them just wound up and had some felted.
I can't stop looking at this bowlful of yarn...
Not sure why I'm loving it so much, but I'm not going to fight it. I'm just going to go with it...
Sometimes you find the project, and sometimes it finds you.
Labels:
Decorating
What I Learned Wednesday: Repurposing Napkins
I've featured several projects featuring repurposing napkins and it might seem like I drive the point over and over about separating the layers of the napkins.
Every time I've skipped this step - I've regretted it. The adhesive sticks to the bottom layer of the napkin and then top layer, the printed layer, either separates, bubbles up or has other issues.
So while it is annoying, when working with napkins, take the time to separate so all you're working with is the printed layer.
Labels:
Wednesday
Tuesday, October 5, 2010
Made 2 Match: Vase
I'm so happy I picked up a whole bunch of these vases when I found them on clearance for $2. I thought 6 was enough, but I only have 2 left. Thankfully, the first 3 are decorated with vinyl so in theory, I could remove the vinyl and start over.
This one - this one is mod podge and a lovely little napkin - undoing it is going to be a little more challenging but that's ok... because I don't want to.
Materials:
Step 2 - Remove all but the unprinted layer from the napkin.
Step 3 - Prepare the vase with a coat of Mod Podge.
Step 4 - Apply the napkin to the vase and coat with another coat of mod podge and recoat several times.
Step 5 - Trim any excess napkin.
Coat with varnish if you like... and there you go, a Made 2 Match Vase!
This one - this one is mod podge and a lovely little napkin - undoing it is going to be a little more challenging but that's ok... because I don't want to.
Materials:
- Ceramic vase
- Mod podge
- Scissors
- Foam brush
- Fabulous napkin - Mine is a Vera napkin, which makes sense since it is part of my Made to Match series...
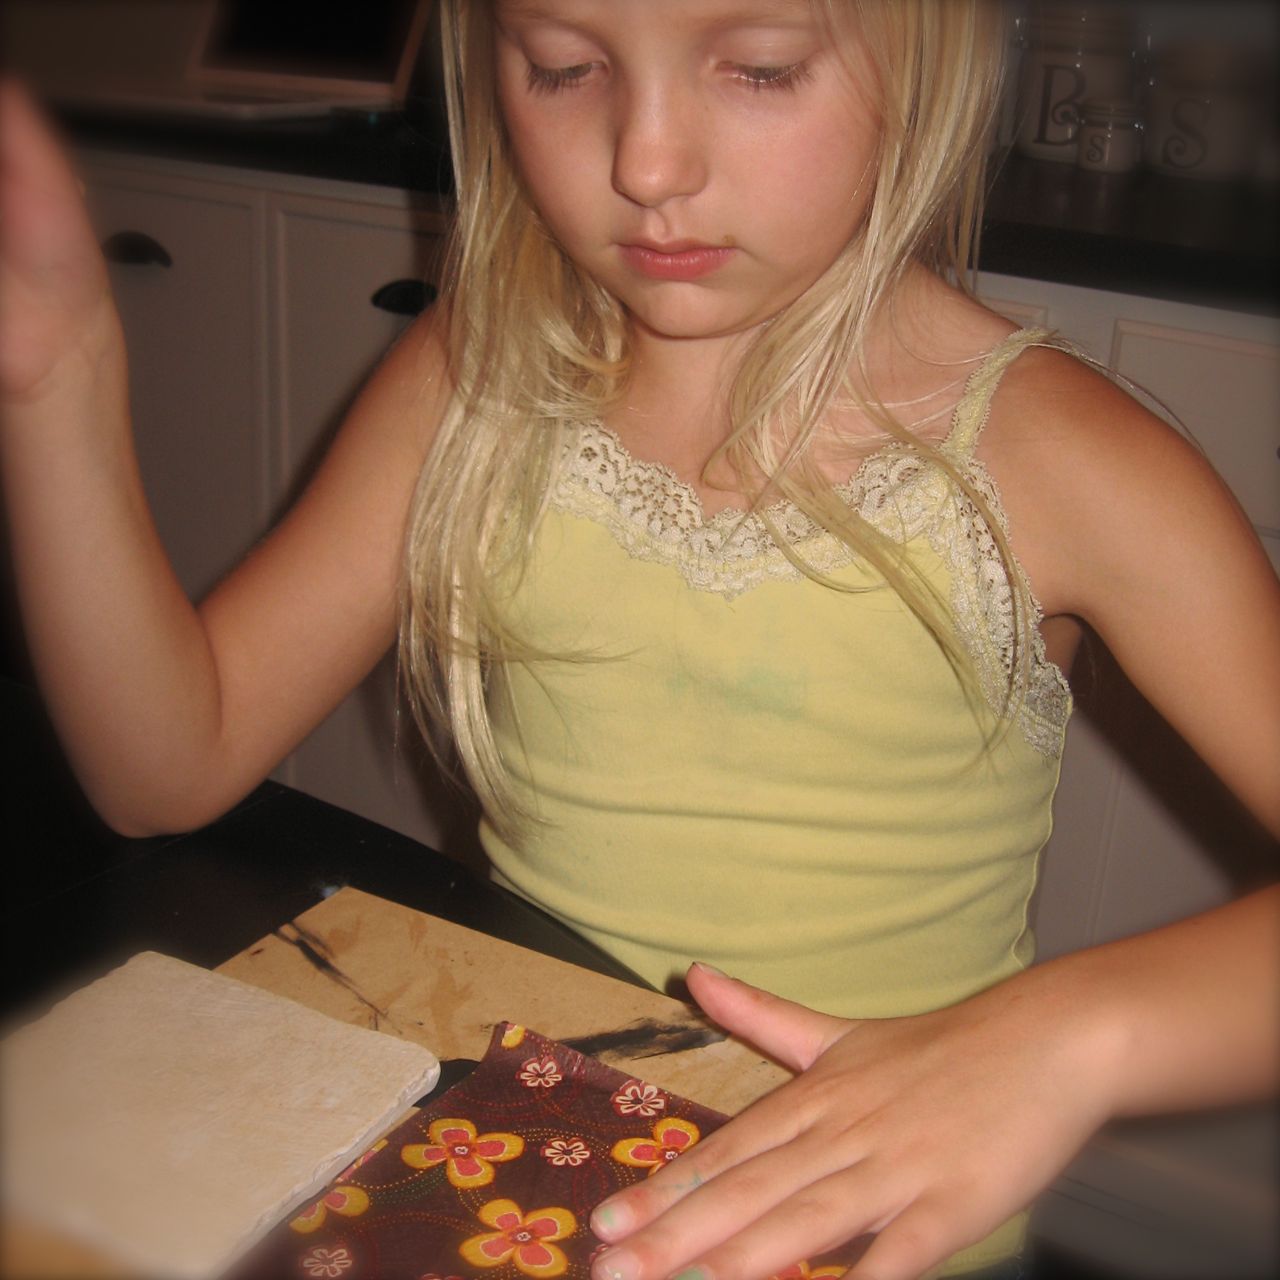
Step 1 - Cut the napkin to feature the desired section of the napkin.
Step 2 - Remove all but the unprinted layer from the napkin.
Step 3 - Prepare the vase with a coat of Mod Podge.
Step 4 - Apply the napkin to the vase and coat with another coat of mod podge and recoat several times.
Step 5 - Trim any excess napkin.
Coat with varnish if you like... and there you go, a Made 2 Match Vase!
Check back tomorrow for a tip about working with napkins in craft projects and don't miss Thursday when I'll feature my 3rd Made 2 Match Vera project.
Labels:
Decopage,
Gifts,
Made 2 Match
Monday, October 4, 2010
Made 2 Match: Votives
Mod Podge + Glass + Vera Napkins = Fabulous little votives... an adorable hostess gift perhaps. The perfect decorations to compliment a party or a great teacher gift.
Materials:
Step 1 - Coat the votive holder with mod podge:
Step 2 - If your napkin is more than 1 ply, as these are, remove all but the printed ply:
Step 3 - Wrap the napkin around the the votive and then coat with more mod podge.
Let dry, and coat with varnish if you want... the mod podge seals it just fine, but the varnish can give it that more finished look.
Add tea light and ta-daaaa....
Materials:
- Glass Votive Candle Holder
- Mod Podge
- Napkin of your choice
- Foam brush
- Varnish
Step 1 - Coat the votive holder with mod podge:
Step 2 - If your napkin is more than 1 ply, as these are, remove all but the printed ply:
Step 3 - Wrap the napkin around the the votive and then coat with more mod podge.
Let dry, and coat with varnish if you want... the mod podge seals it just fine, but the varnish can give it that more finished look.
Add tea light and ta-daaaa....
Check back tomorrow for another Made 2 Match Vera idea!
Labels:
Decopage,
Gifts,
Made 2 Match
Subscribe to:
Posts (Atom)


