Sunday, February 22, 2009

Barnyard Nursery

My kids rooms are by far my favorite rooms in our house.

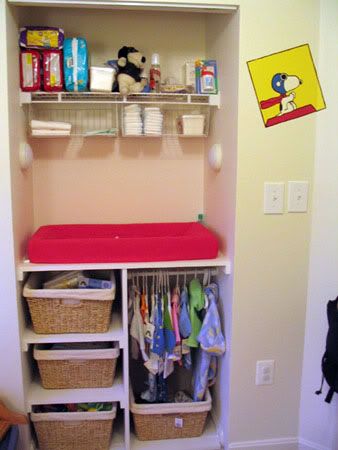
Here is what we did with our son's nusery, building on my favorite piece of furniture ever - the red crib we bought when expecting our daughter. The photos don't do it justice, the piece is actually stained red not painted, so you see subtle texture of the wood. I was nervous about such a bold color for a nursery but I haven't regretted it for a second. I don't think I will ever be able to part with this crib. Long after TJ has outgrown it, this crib will still be somewhere in our house.


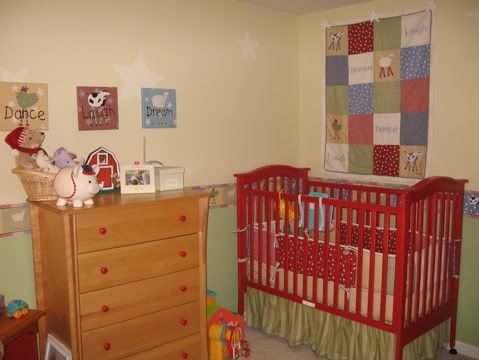
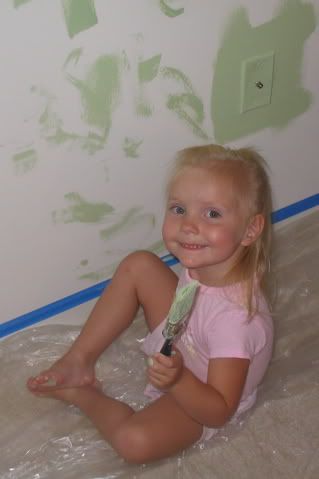
The picture by the door, the one you can't really see cause of my flash - one of my favorite details of the room - it is of our then 3 year old daughter helping us paint the room.


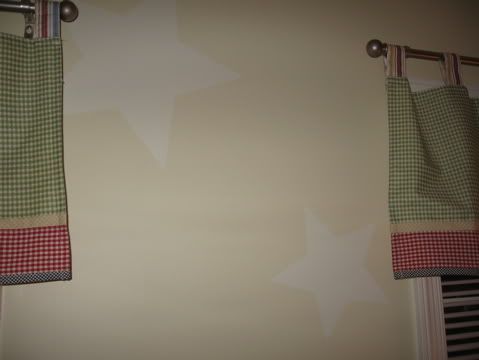
The prints that came with the nursery collection by Kimberly Grant featured stars in the background - stars are my favorite shape... I'm not sure if everyone has a favorite shape, but I do. (I also have a favorite word, 2 of them actually.) So we built off that influence and painted very subtle stars around the room.


I also love how we've saved money in this room - I LOVE LOVE LOVE getting good deals.
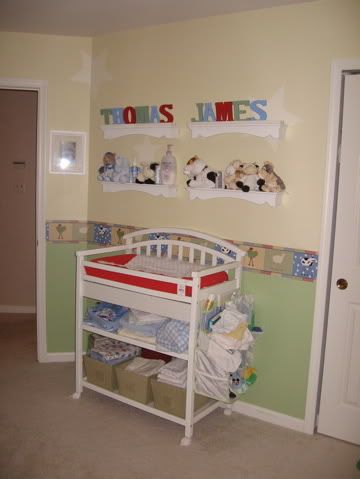
The 4 shelves above the changing table? $3 each off of Craigs list.
The changing table itself? FREE from a coworker who was done having babies.
The bins below the changing table? $4 each on clearance at Tuesday Morning
Picture frames for the room? Bought one by one with 50% off coupons at AC Moore & Micheals
The Nursery Collection? I found it on an obscure website for about 45% off what other's were selling it for.

We're starting to talk big boy rooms for TJ... It is a little while off, but I'm really going to miss it when we do redo it.

Tuesday, February 17, 2009

Another closet solution

I'm going to kick it old school again here, I'm going back 5 years with this post. (I guess I should have had a blog a long, long time ago.)

My husband and I were expecting our first child, Bug, and the room we had planned for the nursery was rather small, as was our budget. It didn't help that I had my eye, and my heart set on a very expensive crib (more on that in the future.) In order to fit everything into the room, and into our budget we decided to skip the changing table by building one ourselves into the closet. (I seem to have a thing for transforming closets.)

It so happened that the closet in Bug's room was just about the perfect width for a changing table. We knew we weren't going to miss the closet, what baby actually needs a full closet height of storage? Certainly not any baby to be born from my 5' 8" husband. So we turned the closet into what became the most functioning part of the room. We had a changing station, hanging storage, baskets for laundry, toys, blankets and other assorted baby essentials. PLUS diapers, wipes and everything you could need to change a baby right at arms reach.

Here is what we came up with:


This project remains one of my favorite of all time. Once again, we hit Home Depot for some simple MDF, 1"x2" poplar, L brackets, some closet accessories and white paint. (In hind sight, I would have painted the walls some other color than white, but I was more focused on the snoopy theme, more on that some other time.) The baskets came from Target.

I wish I still had the plans to share with you, but I'll do my best to answer any questions that aren't answered by the photo above.

And as a bonus, long after we left our town house and our daughter out grew the need for a changing station, we still use the baskets all over the house. The total cost of the project, including the baskets was less than $100. Can't find too many changing tables for that price!

Monday, February 16, 2009

The $200+ light fixture vs. the $18 solution

Pretty much every home in Northern Virginia was built with this light fixture in the dining room.


I cannot even begin to tell you how much I hate this light fixture. But we don't really use the dining room all that much and most of the light fixtures I was looking at to replace it with were running $200+. That's a lot to spend on a room you don't spend a lot of time in. At least in my world it is.

But, I hate that light fixture. (My apologies if you like it...) We actually had it in our previous townhouse and I hated it there too.

Then came my hero, a simple can of spray paint. $4 worth of matte black pray paint + 6 $2 lamp shades from JoAnn's = a light fixture I can live with. (And have been for 4 years now.)


Please ignore the single shade trimmed in black, I thought I was going to do that to all of them and was living with it for a few days when I decided against it. I was too lazy to take another picture. (We also centered the table, but yet again... too lazy to take another picture. Note to self: work on laziness.)

Sunday, February 15, 2009

Necessity is the mother of Creativity

Ok, so I know it is supposed to be "Necessity is the mother of Invention." But in our household, I prefer Necessity is the mother of Creativity. And since becoming the mother of TJ, I've found all kinds of reasons to get creative.

I present, exhibit A: The Fireplace


For my daughter, all we had to do was simply add some foam bumpers around the edges and say "no touch" and she didn't. Ahhh my daughter. : )

For my son, we had the same foam bumpers and we would say "no touch" and he would walk over, look at the foam bumper with a quizical look in his eye, point to the bumper and then proceed to pull it off. We ended up with a 2 foot radius rule around the fire place as we tried to prevent TJ from cracking his head open on it when we realized, we needed a long term solution.

So it was off to Home Depot and JoAnn's where we bought some MDF, "L" brackets, upholstery foam, batting and muslin fabric. Now this is before the days of thinking in terms of explaining things on a blog, as many of my first posts are going to be. (Sorry about that.) So I don't have fun pictures of each and every step... But I do have the finished project including the lovable yet very dangerous toddler boy.

Basically we cut the MDF into 3 pieces, one the hight and width of the fireplace to become the front part, another the width and depth of the fireplace top to be top of the new "bench". We then attached those 2 sections together at a right angle using the "L" brackets. (oh and the other piece of MDF is sitting in the garage awaiting a project to be named later.)

Using a staple gun, we attached the formerly adhessive foam bumpers to the front edge. Then we put the upholstery foam on the top, wrapped the whole thing in batting and fabric and secured with the staple gun.


Ta-daaaaaa!

Originally the muslin was a temporary solution while I searched for the perfect fabric to go with the room. Then I rather fell in love with how it matched carpet and the mortar. Not to mention if something happens to it, muslin costs a lot less to replace.

As an added bonus, this toddler-proofed fireplace now serves as a play surface for the kids, and added seating when we have more guests over than our family room can handle.

*** Please note: this is NOT a firesafe solution! The bench must be removed prior to using the fireplace. ***

Saturday, February 14, 2009

My creative corner, or rather closet...

Being that my creativity is quite diverse I have a lot of creative tools. Over the years I've tried a bit of everything, and in the process I've bought a bit of everything. In addition to being creative, I'm also a pack rat. So for years I had bins and bins of stuff to work with. And just getting started on a project was a project itself as I rummaged through bins and boxes to find the right things I needed to work with.

I find that my creativity thrives best when it is well organized. Many people find "creativity" and "organization" to be exclusive concepts. For me, organization is the foundation that allows my creativity to thrive. It provides order to an otherwise rather chaotic process and allows me to focus my creative energy without the clutter that would otherwise get in the way.

So, we carved out a space for me to store my materials and work on my projects. Sadly, there is no room available in the house for an official "studio." Maybe someday I'll claim the playroom after the kids are too old for it, but for now, I've taken over a closet in the playroom. Here is what we've done...

Before:

After:

There is also a row of boxes on top of the selves with more supplies that you can't see pictured, things that I use less often. So now, everything has a place to be. I've got bins for card making supplies, scrap booking stuff, beading, sewing, stamping, painting, all things adhesive and more.

There is still some finish work to do, but that hasn't stopped me from using my little creative closet.

Wednesday, February 11, 2009

So here I am...

Blogging.

Me? Blogging. Really?

Seriously?

Ok, so words are one of the things I am NOT creative with. At. All. (Though some might say my spelling is pretty creative.)

But I'm finding myself wishing I had a place to collect my creative self and a blog seemed like the best place to do it. So off we go. I'm blogging.
Related Posts with Thumbnails