Tuesday, December 29, 2009

Budding photographer

My son has been drawn to all things electronic, we're constantly finding remotes, phones, camera's in locations with new settings.

I was delighted to find this photo while going through the camera tonight.


That is TJ's "buddy" - his pound puppy that he has slept with and dragged all over this house for at least 2 of his 3 years... He loves buddy, he can't live without him, but some day he will live without buddy and we'll have this adorable picture of buddy through TJ's eyes. Our little budding photographer, or should I say "buddy photographer."

Monday, December 28, 2009

Kids Coasters

When I made these coasters a while back, they were a test run for something bigger down the road.

The Sunday before Christmas, I dragged out the supplies:
  • 1 tile per coaster
  • tissue paper, decorated or undecorated, we used some beautiful Eric Carle tissue paper that I'd picked up at a church thrift sale
  • Modge Podge
  • Heavy duty felt pads
  • Varnish
  • Adorable children to make the coasters that will melt the hearts of their grandparents.


We placed each of the tiles on a paper plate to help contain the mess.

I then tore sections of tissue paper and threw them in the middle of the table and let the kids go crazy.


I imagined the older kids would try to make a picture, but they all went abstract... they all turned out wonderful.


There was a coaster for each grandparents, plus ones for us... oh and the little girl next door who joined us, she took home 4 as well.

I'd love to repeat this as the kids get older to see what they come up with.

Sunday, December 27, 2009

A little holiday recap...

There were a few projects/decorations that I was thrilled with how they turned out that I didn't have time to blog about. But it would be a shame to not post about them just because the calendar says that holiday has passed.

Here they are - my Christmas Wreath and accessories... not how I planned them to turn out, but I'm thrilled with them anyway.


Dinning room displays.


Our snowman collection:


One of my favorite gifts, an ornament made by a friend featuring the kids.


Soon, these treasures will be boxed up 'till next year... I'll miss them.

Wednesday, December 23, 2009

Fantastic (Fake) Fudge

Do yourself a favor, if you like fudge - get the ingredients for this and MAKE IT NOW.

If you're a work, leave work, buy the ingredients and make the fudge.

You won't regret it. I promise.

I've been making this for at least 10 years or so, and every year anyone eats it, their eyes roll back into their heads and they can't believe how good it is. (Have I built it up enough yet???)

Here is what you need:
 Directions:
  1. Microwave 4 of the chocolate squares, 6 Tbs. of butter and the water in a large microwave bowl on 50% power 2 minutes; stir and repeat until butter and chocolate are melted.
  2. Add dry pudding mix; stir until well blended.
  3. Add powdered sugar, 1 cup at a time, stirring until well blended after each addition. (The 1 cup at a time is important, don't just dump the 3 cups in at once... you'll ruin the fudge and I won't be held responsible for your disappointment.)
  4. Press mixture into foil-lined 8-inch square pan.
  5. Microwave remaining 4 chocolate squares and 2 tablespoons butter in large microwaveable bowl on 50% power for 1 minute; stir, and repeat 'till melted.
  6. Spread over pudding mixture.
  7. Refrigerate 2 hours or until firm.
  8. Cut into 48 (1 inch) squares. I find it easy to pull the fudge out of the pan by the foil lining, then remove the foil and slice with a warm knife.
  9. Take a few pieces into a nice quiet place... maybe by the Christmas tree and enjoy. Thought it might not be a good idea to try it before you share it - you might no longer want to give any away. (it is for this reason that I always make a double batch.)

Sunday, December 20, 2009

Truely Handmade


I saw these two projects at my daughters school and had to share them - someone with a cricut and SCAL software could really whip this project up quickly but I think it would be pretty easy without the fancy tools as well.


What a fun way to remember how small the kids hands were when they were small.

: )

Office Holiday Cheer


The social committee for the Association I work at had the great idea to have a door decorating contest to help get us all in the holiday spirit. I never really thought of doing something like this at home but maybe next year the kids can decorate their doors, or we can do something more fun than a typical wreath on our front door.

Here were some of my favorite doors:


And here is my door: (Inspired and featuring by my daughters penguin drawing)


Saturday, December 12, 2009

And the stockings...

Were made by Maggie with care.


Sorry - these go back to my pre-blogging days, no tutorial or pictures. But what I did, and I'm happy I did, I bought a pattern to make them. Doing the cuff turned out to be more complicated that I anticipated and without the pattern I'm quite sure I wouldn't have completed them. And that would have really upset me because I spent way too much on the fabric.

We've got 4 of these, green tops for the boys, red tops for the girls with a simple silver initial pin to tell them apart.

Friday, December 11, 2009

B Collection

A couple of months ago, in a magazine I've long since misplaced, I saw a wonderful idea - they had filled a large vase with letters of the same color (white) and style...

I loved the idea but had to make it our own just a bit, by going with only the letter "B" - our last initial and going with every style and color we can find. Our collection is still growing, but I'm really happy with the way it has come together.


Excuse the clutter in the background... Yikes, that is rather embarrassing, but not embarrassing enough to actually go clean it up and retake the picture. 

Thursday, December 10, 2009

Non-traditional Holiday Decorating

Some of my favorite things to decorate with at the holiday time aren't actually holiday decorations at all. I'm a bit behind in my holiday decorating, but here is one example:


We filled my son's red radio flyer wagon with both holiday and non-holiday snoopy's, a family favorite character and then layered in holiday Peanuts books. I love pulling out seasonal books and using them as decoration. The kids know they can pluck the books out and curl up with them and I think they are more accessible than if they were on the bookshelf.

I'll post more of our non-traditional holiday decor later, you know, after I actually unpack it.

Tuesday, December 8, 2009

Hobby Lobby Envy - Part 2

My Hobby Lobby Envy has reached new heights.

It was bad enough when I just had to read on various blogs about the wonders of Hobby Lobby. Over Thanksgiving I got a chance to visit one, in Syracuse NY of all places... can someone PLEASE tell me why Syracuse NY has a Hobby Lobby and Northern Virginia does not???

Look... look at this place!!!


Look at all this paper. Seriously, if you combine all the craft paper in Northern Virginia it wouldn't amount to this selection.


They've got everything, paper, fabric, home decor, frames, furniture, you name it... they've got it.

Just not in Northern Virginia.

Monday, December 7, 2009

Secret Trees

Shhhhh... I've got a secret. One of my handmade holiday items came from Victoria's Secret.


Seriously... While shopping over the weekend, found this at Victoria's Secret... Sorry for the creative cropping but lets review, they were at VS and there isn't a lot of family friendly things in the background of VS. (Also forgive the photo quality... camera phone.)


Cute tree huh?

I figured I could make something like that so I gathered a few things...

Pictured and not pictured for this project:
  • Ribbon and various textures, widths and colors
  • 1 styrofoam cone per tree
  • Glue gun
Step 1 - Cut the ribbon strips in a various selection of sizes, ranging from about 3" to 5"


Step 2 - Glue the ribbon in loops onto the form.


Step 3 - repeat gluing 'till the top of the tree.
Step 4 - Well, really that is about it.
Step 5 - Enjoy the wonderful trees.

You can make your trees as loopy or as droopy as you like by varying the length of the ribbon, I wanted them a bit more loopy - but it is totally up to you.

Thursday, December 3, 2009

My first Cricut project

Here it is, my first Cricut project. It is handmade, it is for the holidays... so it qualifies as a Handmade for the Holidays special.


So far, I've not been overly thrilled with the Cricut but I'm not throwing in the towel. I decided to make some ornaments tonight.

Here is what I started with:

Pictured and not pictured...
1 sheet of holiday scrap book paper, double sided
1 sheet of white paper
Grommets and tools to go with them
Brads
Hole punch
Cricut

Step 1 - Cut 3 strips of of the craft paper per ornament.
Step 2 - Cut bird shapes with the Cricut, but you could do anything really. With the Cricut or without. You could grab any of the precut shapes in the craft section of your favorite store.


Step 3 -Assemble the birds.


Step 4 - Place a grommet in the top of the bird...


And I actually made a mistake with this step and had to go back and remake the birds... I put the grommet hole in the wrong spot so the birds hung funny... See:


This is how I wanted them to hang:


Step 5 - Punch holes in the top, bottom and middle of the strips of paper.
Step 6 - Lay 3 of the strips of paper criss-cross on top of one of the brads and then lay the string for the bird on top.


Step 6 - Open the brad to secure the 3 strips of paper and bird together.
Step 7 - Bring the strips of paper around to the top and then poke the 2nd brad through the wholes and secure.
Step 8 - Attach a string to the top and you're done!


Wednesday, December 2, 2009

Gingerbread Cookies


Ok, again, I'm going to take some liberty with the "Handmade Holidays" theme here... Much like with our gingerbread house tradition, our Gingerbread Men tradition comes out of a box.

I know, pathetic. But sometimes, when juggling the holidays, the family (extended and not), work and that happens in December, including 4 family birthday's - you do what you have to do to survive - and that means Gingerbread Men from a box.


And part of our tradition, includes sharing things like this with the sweet adorable kids above. There is something about sharing projects with friends that make them so much more fun.
 

Tuesday, December 1, 2009

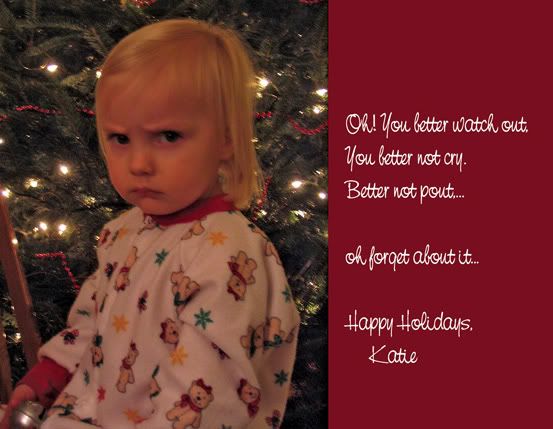
When Holiday Cards Go Wrong


I used to torture Bug with trying to stage adorable Christmas Cards. She decided to torture me by not cooperating.

So.... I decided to torture her back, by created these lovely "B-List" cards. Only one of them ever actually got printed, but don't worry, it was sent with an adorable version as well.


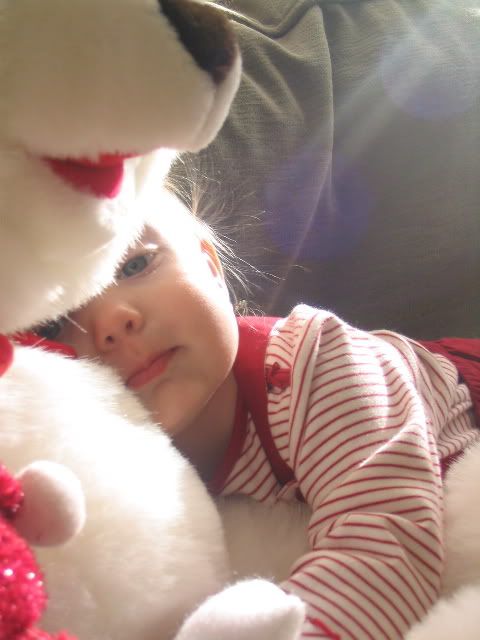
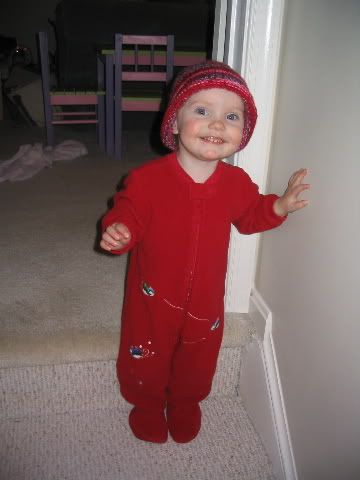
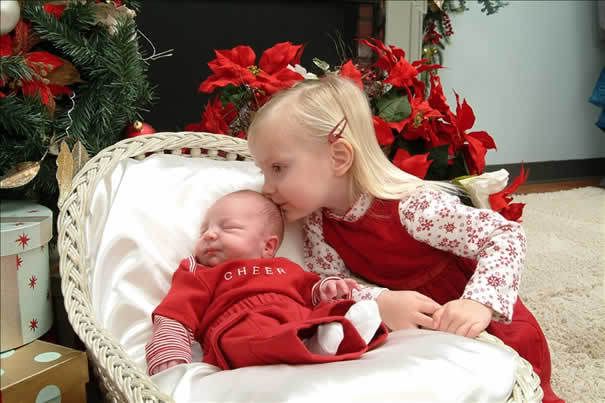
To be fair, she is hardly ever that much of a sour puss...  here are a few to prove it.


And my favorite ever...

*sigh*

 
Related Posts with Thumbnails